As detailed in the Quick Start Setup Guide, the IP/Domain Setup screen is where you can add, delete or modify the domains for which email handling and processing will be done by your Anti-Spam Firewall system.
To set up your Anti-Spam Firewall system to accept and process email for a domain select "IP/Domain Setup" in the left side menu bar.
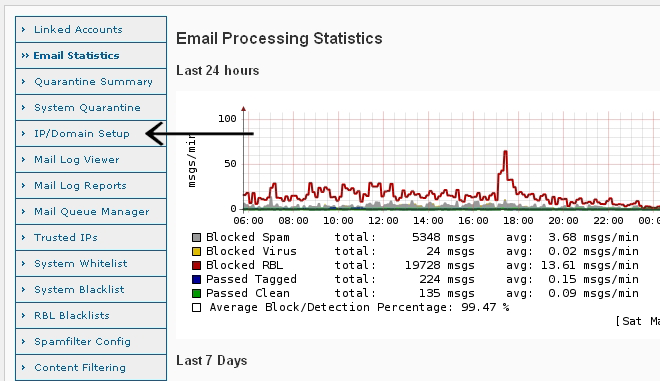
You will be presented with a screen that will allow you to configure domain name and associated mail server IP address or host name settings for the domains you would like to have the Anti-Spam Firewall process email for.
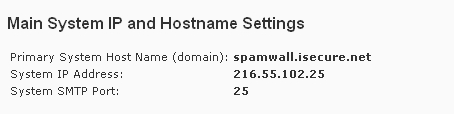
Under the Main System IP and Hostname Settings the Primary System Host Name will already be configured with a "spamfirewall.yourdomain.com" type sub-domain along with the IP address which is associated with and dedicated to your Anti-Spam Firewall system.
Domains that you will set up email processing for are added under the Add Relay Domain and Destination Email Server section of the IP/Domain Setup screen.
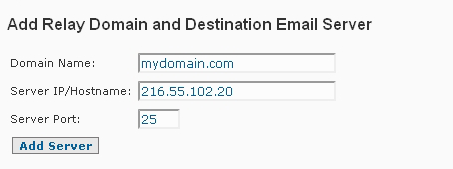
In the "Domain Name" field you should place the name of the domain or sub-domain you want the Anti-Spam Firewall system to process email for. This would be in the "mydomain.com" format.
The IP address or host name of the receiving email server, which is usually your existing mail server IP or host for the domain, should be placed in the "Server IP/Hostname" field in the "xxx.xxx.xxx.xxx" or "mail.mydomain.com" type format.
The "Server Port" is the port number that you want the processed email to be delivered to. This is usually your mail server default SMTP port, which is usually Port 25.
You can also use host names for the destination email server instead of IP addresses.
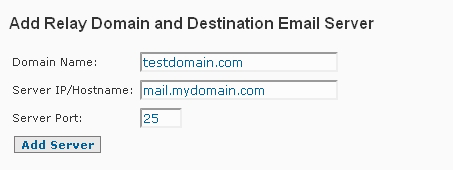
After completing these fields you then select the "Add Server" button to complete the process of adding the domain to your Anti-Spam Firewall for processing.
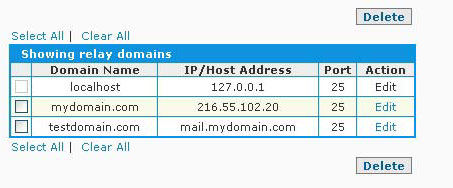
The Anti-Spam Firewall system will then confirm that the new entry has been successfully set up. The domain along with it's receiving email server IP number or host name and port number will appear as below.
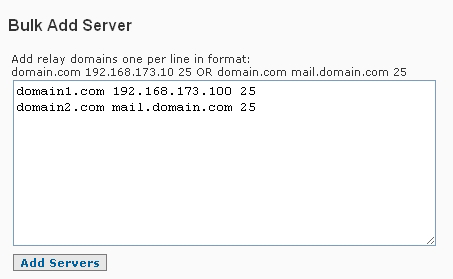
It is also possible to add domains in bulk by using the Bulk Add Server option. With this option domains and their associated destination email server IP address or host name and port are added one entry per line in the following format:
domain1.com 192.168.173.100 25
domain2.com mail.domain.com 25
Domains that you have set up on your Anti-Spam Firewall system can be deleted by selecting "Delete" under the "Action" heading in the list of domains set up on the system displayed at the bottom of the screen. You will be prompted to confirm any deletions before a domain is finally deleted. You can also use the "Edit" function to change the IP address or port number associated with a domain.
Your Anti-Spam Firewall system is now all set up and ready to receive, process and filter, and then forward on the processed email for the domain(s) you have set up to the specified receiving email server(s).
No additional configuration is necessary at this time but you can review other sections of the manual such as Anti-Spam Firewall Control Panel Overview and Tuning your Anti-Spam Firewall for information on other available features and configuration options including how to improve and fine tune Spam filtering behavior and results based on the type and content of email traffic received by your users if required.
Once you have set up your Anti-Spam Firewall to provide email filtering for your domain(s) you then need to direct email for the domains to the Anti-Spam Firewall system for processing This is done by modifying the "MX" record for a given domain to map it to the IP address of your Anti-Spam Firewall system. An MX or "Mail Exchange" record tells mail servers around the world where to send the email for your domain. Setup of MX and other related DNS records is covered in the Setting Up Your MX Records section of the guide.
 Mail Log Viewer
